How to Start a Blog in 2025: A Stress-Free Guide for Absolute Beginners
Feeling overwhelmed by technical jargon? This step-by-step guide shows you exactly how to start a blog from scratch, without the stress. Perfect for absolute beginners!
TOOLS & RESOURCES
10/1/20256 min read


Have you ever googled "how to start a blog" and closed the tab five minutes later because words like "web hosting" and "domain name" made your eyes glaze over?
I know that feeling. It’s exactly what happened to me.
I remember thinking, "Do I need to be a computer programmer just to share my thoughts?" I felt so out of my depth that I almost gave up before I even started. My dream blog was stuck in my head because the technical setup felt like an impossible wall.
What finally broke the spell for me was stumbling upon a YouTube video where a creator explained it in such simple, friendly terms. She didn't use any confusing jargon, and she just clicked a few buttons to make a blog appear. I remember thinking, 'Oh! That's it? I can do that.' That one video gave me the courage to finally begin.
But here's what I learned the hard way: starting a blog is like assembling IKEA furniture. It looks like a jumble of confusing parts, but if you have the instructions with all the pictures, it's actually simple. You don't need to be a master carpenter; you just need to follow the steps.
This guide is those instructions. I’m going to be your friendly guide, showing you exactly which part goes where. No confusing jargon, I promise. Let's build your blog together.
Step 1: Find Your "Why" (Your Niche & Purpose)
Before we touch any technology, let’s talk about the most important part: your purpose.
Why do you want to start a blog? Is it to share your travel stories? To teach others about vegan cooking? To document your journey learning a new skill?
This "why" is your compass. It will guide everything you do and keep you motivated when things feel challenging. Don’t get stuck trying to pick a "perfect" niche. Choose a topic you’re genuinely passionate about. Your enthusiasm will shine through and attract readers.
Action Item: Don't just use a blank notebook! I created a free "Side Hustle Starter Clarity Pack" to guide you through this exact exercise. It will help you clarify your goals, skills, and the vibe you want for your hustle in less than 10 minutes. [Download your free worksheet here].
Step 2: Choose a Memorable Blog Name (Your Domain)
Now for the fun part: naming your blog! Your blog’s name is also known as your domain name. This is your address on the internet, like www.YourAwesomeBlog.com.
What is a domain name, simply put?
Think of it as your digital street address. It’s how people find your home (your blog) in the vast neighborhood of the internet.
Tips for Choosing a Great Domain Name:
Keep it short and simple: Easy to spell and remember.
Use a .com extension: It’s the most recognized and trusted.
Make it relevant: Ideally, it should give a hint about your blog’s topic.
Avoid hyphens and numbers: They are confusing when spoken aloud.
Use a domain checker (most hosting companies have one) to see if your dream name is available.
Step 3: Get Your Blog Online (Your Web Hosting)
This is the most technical-sounding step, but I promise it’s straightforward. To have a blog, you need a place to store all its files, images, and code. This service is called web hosting.
What is web hosting, exactly?
Let’s use our "home" analogy. If your domain name is your street address, then web hosting is the actual plot of land where your house (your blog) is built. You can’t have a house without land, and you can’t have a website without hosting.
Why is it necessary?
Without a hosting provider, your blog has nowhere to "live" online. It’s just a file on your computer. Hosting makes it accessible to everyone in the world.
What should a beginner look for in a host?
You don’t need the biggest or most powerful plan. You need:
Affordability: A low-cost entry point.
Easy Setup: A one-click installer for WordPress (more on that next).
Good Support: Helpful customer service if you get stuck.
My Research-Based Recommendation for Beginners:
Now, let's talk about where to actually get your hosting. I'm committed to giving you honest advice, so I want to be upfront: I personally use [Hostinger] for my own sites. However, when I help absolute beginners, I often point them toward Namecheap.
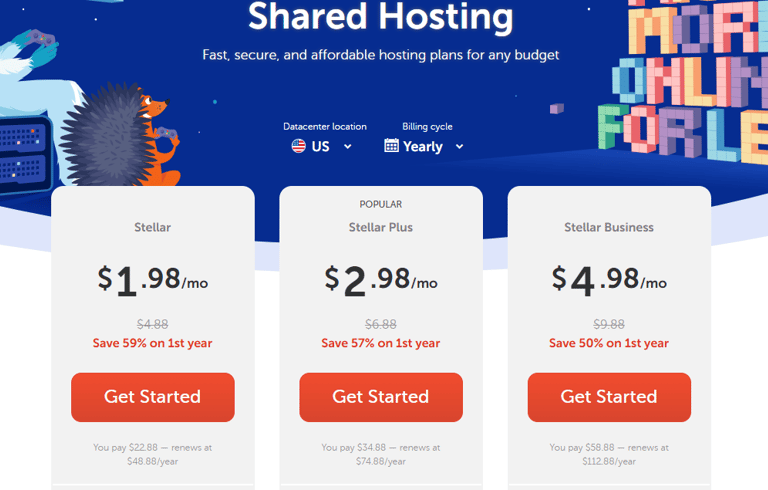
Why? After extensively comparing the top budget-friendly options, Namecheap's Stellar Shared Hosting consistently stands out for someone taking their first steps. Here’s what makes it a great choice:
It's Kind to Your Wallet: The plan starts at $2.98 per month for the first year. For a beginner, that low cost removes a huge barrier to getting started.
It includes a Free Domain: They give you a free domain name for the first year, which is one less thing to pay for and set up separately.
The Setup is Truly Simple: They have a one-click installer for WordPress (it's called Softaculous), which means you can go from signing up to building your site in minutes.
I'm confident in recommending them based on my research and the positive experiences of many other new bloggers.
To see exactly how simple the process is, this tutorial walks you through signing up and installing WordPress on Namecheap step-by-step.
Step 4: Install WordPress & Choose a Theme
Congratulations! Once you sign up for hosting, you own your plot of land. Now, let’s build the house. The easiest way to do that is with WordPress.
WordPress is free software that powers over 40% of all websites. It’s what we call a Content Management System (CMS)—a fancy term for a tool that lets you create and manage your blog without coding.
How to Install WordPress:
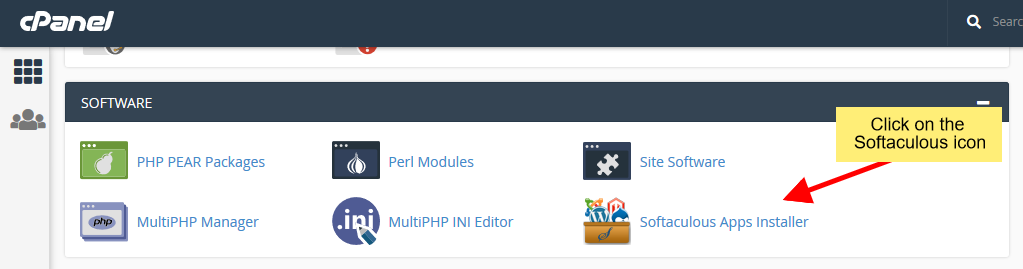
The great news is that your hosting provider makes this easy. In your Namecheap account dashboard, you’ll find a section called "Softaculous Apps Installer" or something similar. Look for the WordPress icon and click "Install." It will guide you through a simple process—it truly is just a few clicks!
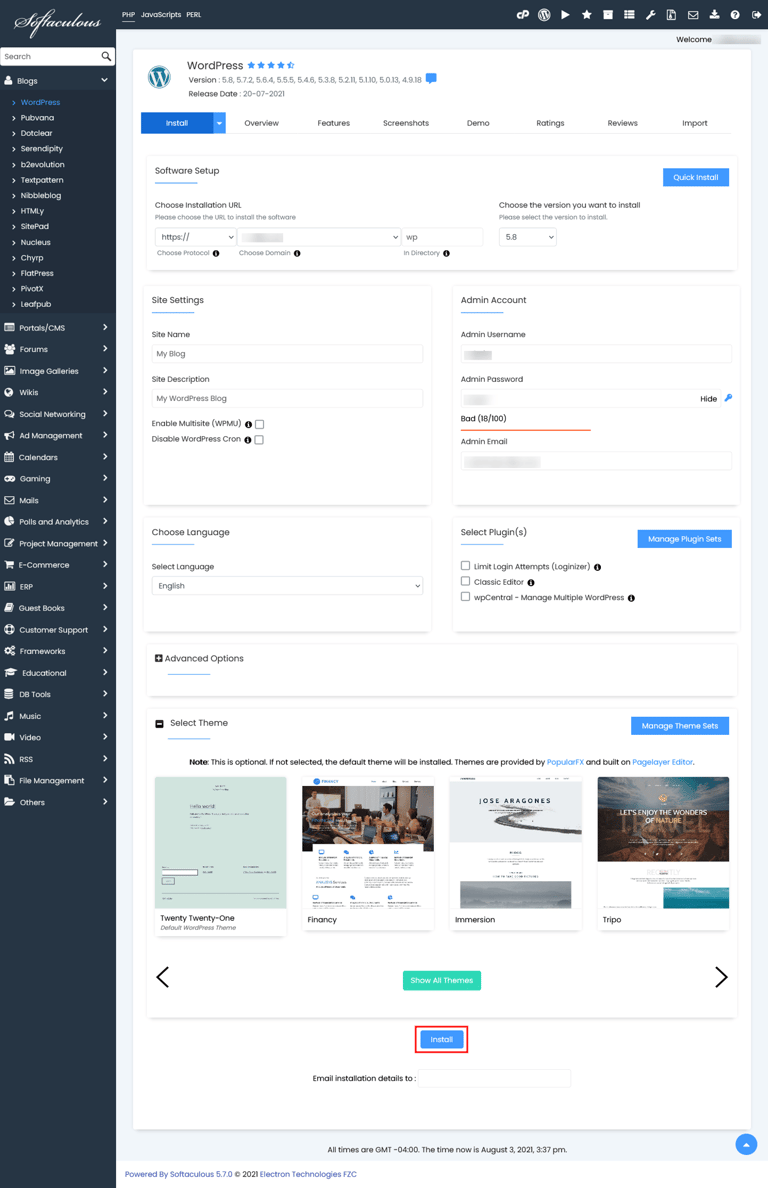
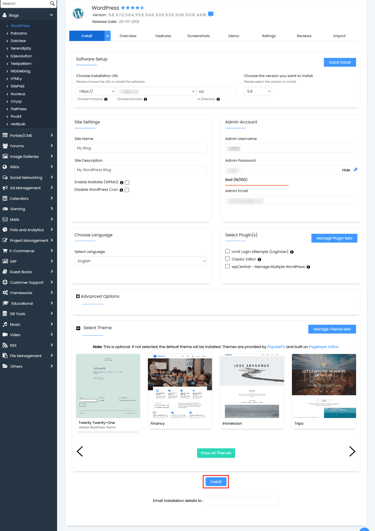
Find and click on the "Softaculous Apps Installer" icon in your cPanel
Fill in your blog's name and description. You can leave most other settings as their defaults.
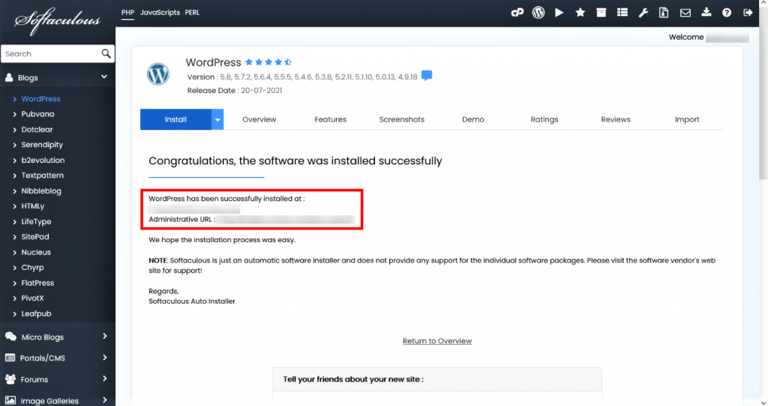
Click the 'Install' button at the bottom. In less than a minute, you'll see a success message confirming your blog is live!
When you see this "Congratulations" screen, your WordPress blog has been successfully installed!
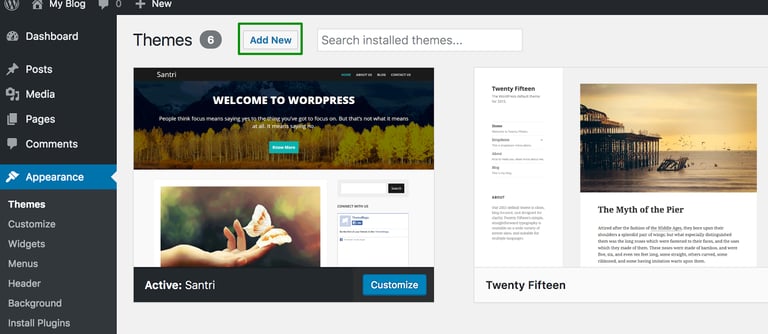
Choosing Your First Theme:
A "theme" controls how your blog looks—the design, colors, and layout. After installing WordPress, you can browse thousands of free themes. For now, choose a simple, clean, and responsive (meaning it looks good on phones) theme. You can always change it later! Don’t let perfect design stop you from launching
Go to Appearance > Themes in your WordPress dashboard to see your current theme and browse for new ones.
Step 5: Write Your First Blog Post!
Your blog is live! The platform is set up. Now comes the best part: creating content.
Your first post doesn’t need to be a masterpiece. It can be simple. Here are a few ideas:
An Introduction: "Hello World! Why I’m Starting This Blog"
Your Story: "My Journey to [Your Topic] So Far"
A Lesson Learned: "The Biggest Mistake I Made as a Beginner in [Your Topic]"
Just hit the "Publish" button. The goal is to break the ice and make your blog feel real. You can (and will) improve with every post you write.
You Did It! What’s Next?
Take a moment to celebrate. You’ve successfully navigated the technical setup and started your blogging journey.
Your next steps are simple:
Commit to a schedule: Consistency is key. Aim for one new post per week to start.
Learn as you go: Don’t try to learn everything at once. Focus on writing, and pick up new skills like SEO and social media promotion gradually.
Connect with others: Read and comment on other blogs in your niche. Building community is powerful.
Remember, every expert blogger was once a beginner who didn’t know where to start. You’ve just taken the most important step.
Feel free to leave a comment below with a link to your new blog—I’d love to see what you create!
Happy blogging!